Showing posts with label recipes. Show all posts

Tuesday, July 4, 2017

Happy 4th of July! Apple Cobbler recipe


Need dessert tonight?

Apple Cobbler


This recipe is a little different than my usual cobbler.

But it was a definite winner at our house today!


Whipping Cream or Vanilla Ice Cream is perfect a few  minutes out of the oven,

and, also the aroma of all the ingredients cooking for 30 minutes in the oven will please the crowd!!!


~~~~~~~~and it will definitely go fast so prepare in a 3 quart long oval casserole dish.


The cinnamon, vanilla and butter are awesome.


You will need to preheat the oven to 350 degree F

Take about 8 medium size apples or enough for 2 cups here or there chopped in medium pieces after peeling.

Sprinkle a good 1/4 cup of brown sugar all through the cut up apples and stir and let rest for a few minutes.

Grease a 2-3 quart glass long baking dish with olive oil

Take all the cut, brown sugar coated apples and place by hand in the cassserole dish.

Sprinkle about 1 tablespoon of cinnamon over the apples.

Then, with a mixer combine 1 egg and 1 cup of white sugar and 1/2 cup of milk well.

In another bowl, put dry ingredient of 1 cup of self-rising flour

Melt 2 tablespoons of stick butter in a small cup 

With the mixer and sugar, egg, milk combo, mix in flour, melted butter and 2 teaspoons of vanilla extract

Continue mixing the batter. This batter will be thicker and will produce a cake-like moist cobbler.

Pour all the thick batter over the apples evenly. Do not worry if apples are still seen. The crust will rise around them.

Put in oven to cook 30 minutes.

Take out of the oven and let rest 5 minutes or 10 before serving warm.

Top with ice cream or whipping cream.

In this recipe, I substituted Lactaid milk with no problem or detection of tasting differently.

We are having barbeque chicken in the crock pot, 3 color spiral pasta/egg salad with fresh veggies, corn on the cob and biscuits!


I hope you enjoy and have a safe 4th!

Jennifer

Thursday, June 20, 2013

Oatmeal Cookies from scratch!

My hands are never idle. If they are I'm sleeping. Today is our 7 month anniversary! We have kinda set a tradition to have a homemade dessert on our anniversary date month. So....................

today is Oatmeal Cookies. Not just the plain ones. Well, the basic recipe with a little jazz and pizazz.

These turned out so well just like I like them, thin and slightly crispy!


Yes, the homestead is fragrant with Home. Sweet. Home.


Yes they are YUM!

I tweaked the recipe out of the Better Homes and Garden Cookbook I have. Abbie is drooling as I type while I eat one now.  :P

This is my improvised version and it seems to make them more thin and crispy but soft in the middle.

Fox Mountain Homestead Oatmeal Cookies
 
1 and 1/2 sticks of butter, softened well
1 cup of packed brown sugar + a smidgen more (1 tbsp)
1/2 cup of granulated sugar
1 tsp of baking powder
1/4 ( or a tiny grains less) of baking soda
2 and 1/2 or so tsp of cinnamon (the more the better)
1/4 tsp of ground cloves
2 eggs
3 tsp of pure vanilla flavoring (no imitations)
1 and 1/2 cups of all purpose flour
2 cups of dried oats (uncooked, in quaker oatmeal paper cannister)
1/2 tsp of salt
1/2 cup of finely crushed walnuts
 
 
Gather all your ingredients and preheat the oven to 375 degrees. The best way to yield a cookie without a darkened edge too much is to use Parchment paper. You can find it by the aluminum paper in the grocery store. A box will last forever. You only tear off a sheet large enough to cover a cooking pan. This make sure no sticking and is easy to clean up when finished. The paper will not burn unless you are baking over 450 degees.
 
In a mixing bowl, beat the butter with an electric mixer on medium-high for 30 sec to a minute.
 
Add brown sugar, granulated sugar, baking powder, baking soda, and the salt, cinnamon, and cloves.
Beat in eggs and vanilla all together at one time.
Beat in all of the all-purpose flour for about 2 minutes.
 
Then  take off the beaters and hand one to your soulmate and one for you to enjoy and remember sweetness.
 
Then take a large spoon and fold in the batter the 2 cups of oats and the walnuts.
Stir all batter well.
 
On the parchment paper covered baking sheet, put 1 well rounded tsp about 2 inches apart (these spread alot)
 
Put in oven and set cooking time for 8 minutes.
 
Then when 8 minutes are up, scoop right away to a plate with a spatula (if you wait till they cool they cook longer even while not in the oven from the heat of the pan)
 
This makes the chewiest, thin, crispy oatmeal cookie you'll ever eat!!!!
 
When the plate is full set under your glass cake stand an enjoy with coffee, milk, or hot tea.


Place near the sofa and watch an episode of The Waltons!
 
 
Live simple.
 
Count blessings.
 
Spread love.

Saturday, February 2, 2013

Pink Knitting and Banana Nut Bread Recipe


A special friend wants a pink and green scarf. I did not get it done before Christmas, so here goes for Valentines Day!
I found this gorgeous, soft yarn at Joanne's on sale. 

Deborah Norville
Serenity
Red Bayou
2 skeins

I think she will like it. I haven't decided if I am going to put some other stitches in this. I'm tempted to do some different ones.............................just tempted.


Using #11 needles, Bates aluminum,  I picked it up with a cup of coffee after my slice of NANNER bread and went to knitting. The wood stove burned all night and this morning it's got it toasty and cozy in here. 
PERFECT, I think! We both slept like a rock last night.

After I stitched several rows in garter stitch, I just had to show you you the lovely pinks, greens, plums this scarf will have.

 I cast on 26st.


And this little sweetie, Abigail is gathering any banana nut bread crumbs left from the little end we haven't eaten.
IT WENT FAST!

Sorry I didn't get a pic when it came out of the oven but it's a way yum recipe. I think it tastes better than the one in Southern Living magazine and that used to be my favorite.

I will warn you that in order for this NOT to overflow in your oven, set aside part of the batter for some little muffins or something. Mine overflowed pretty bad in the oven, using the streusel recommended in the larger size pan they recommended.

Here's the recipe for it!

This is from an old Better Homes and Garden book that is PRICELESS at Fox mountain.

Banana Bread

Make this favorite quick bread extra special by sprinkling streusel topping over the batter before baking.

2 cups all purpose flour
1 1/2 tsp. baking powder
1/2 tsp baking soda
1/4 tsp salt
1 tsp of cinnamon
1/2 tsp of nutmeg
2 eggs, beaten
1 1/2 cups of mashed ripe bananas ( medium)
1 cup of sugar
1/2 cup cooking oil
1 small bag of chopped Walnuts
1 recipe Streusel-nut Topping (optional but I use it)


Preheat oven to 350 degrees. Grease bottom and sides of one 9 x 5 x 3 inch OR 2 71/2  x 3 1/2 x 2 inch loaf pans. Set aside.

In a large bowl, combine flour, baking powder, baking soda, salt, cinnamon, and nutmeg. Make a well in the center of the flour mixture and set aside.

In another large bowl, combine eggs, banana, sugar and oil. Add egg mixture all at once to flour mixture. Stir just until moistened (batter should be lumpy) ~~~~I did use my mixer,and liked it that way.
Fold in Walnuts with a spoon. Use 3/4 of the bag.

Spoon batter into prepared pan. If desired, sprinkle the Streusel-nut Topping over the batter in the pan.

Bake for 55-60 minutes for 9 x 5x 3 inch pan or 40-45 minutes for the smaller 2 pans OR until wooden toothpick inserted near center is clean.
I recommend covering with aluminum foil for the last 15 minutes of baking to prevent over browning.
Cool in pan on rack for 30 minutes before slicing or removing from pan.

OK~~~~~~~~the BEST PART
The Streusel Nut Topping

In a small bowl combine 1/4 cup packed brown sugar and 3 tbsp of all purpose flour. Using a pastry blender (I used a knife and edge of spoon), cut in 2 tbsp of soft butter (spread butter) until mixture resembles really course crumbs. Stir in the rest of the Walnuts and then sprinkle on top of the batter in the pan.

Yum!
Enjoy!


That's alot of yummies in one day!

I enjoy your comments and emails! I"m still learning at this knitting but so much enjoying it.
I also started a Valentine freebie of my own for the model.
It's going fast and I will post this later.


Have a cuppa and carry on,
Jennifer

Sunday, December 2, 2012

A Super Sweet December weekend

When I was a wee, little girl, Christmas time was always the best. We struggled like many folks and I remember that all our trees were "real" and several times I went with my dad to go out in the woods somewhere and we would pick out a tree together. If I liked one bigger, he would climb way to the top and cut the top of it off for the tree. As I grew older we bought trees or an artificial one but never would they replace those wispy ones from the woods we put in a bucket inside.
 
This is me. All giddy on Christmas Eve with my brother in matching pjs. I used to think that was so neat. We got one pair like that right before Christmas for a pic under the tree. I was 5 years old here and had made a Santa and proud to put his limp self with cotton balls and all right under the tree for Santa to see when he came to put the presents around!
 
Of course back then, mama put alot of icicles on the tree and as I grew older, she let me put them on there. I think then she would go back and even them out. :o


Those were the simple times.
 
 I guess my love for crafting came very early in life even way before this when I got put in the time out chair in kindergarten for playing with my crayons when I was supposed to be listening.

 
This weekend, Mr. Darcy and I went to a lovely, huge Christmas party and danced till we couldn't anymore. We had so much fun. The food was overflowing, the music was good too.
 
So, today I've been getting a little out of the village and decorating a bit. I'll show you some pics later but here are a few sneak peaks. We even got a pic with Santa but I don't have it with me right now.


more of the village when I get finished with it. It honestly takes a good 2-3 hours of set up.
I used a different "snow" this year. I so miss the other kind but couldn't find it in stores so I basically used the poly stuff.


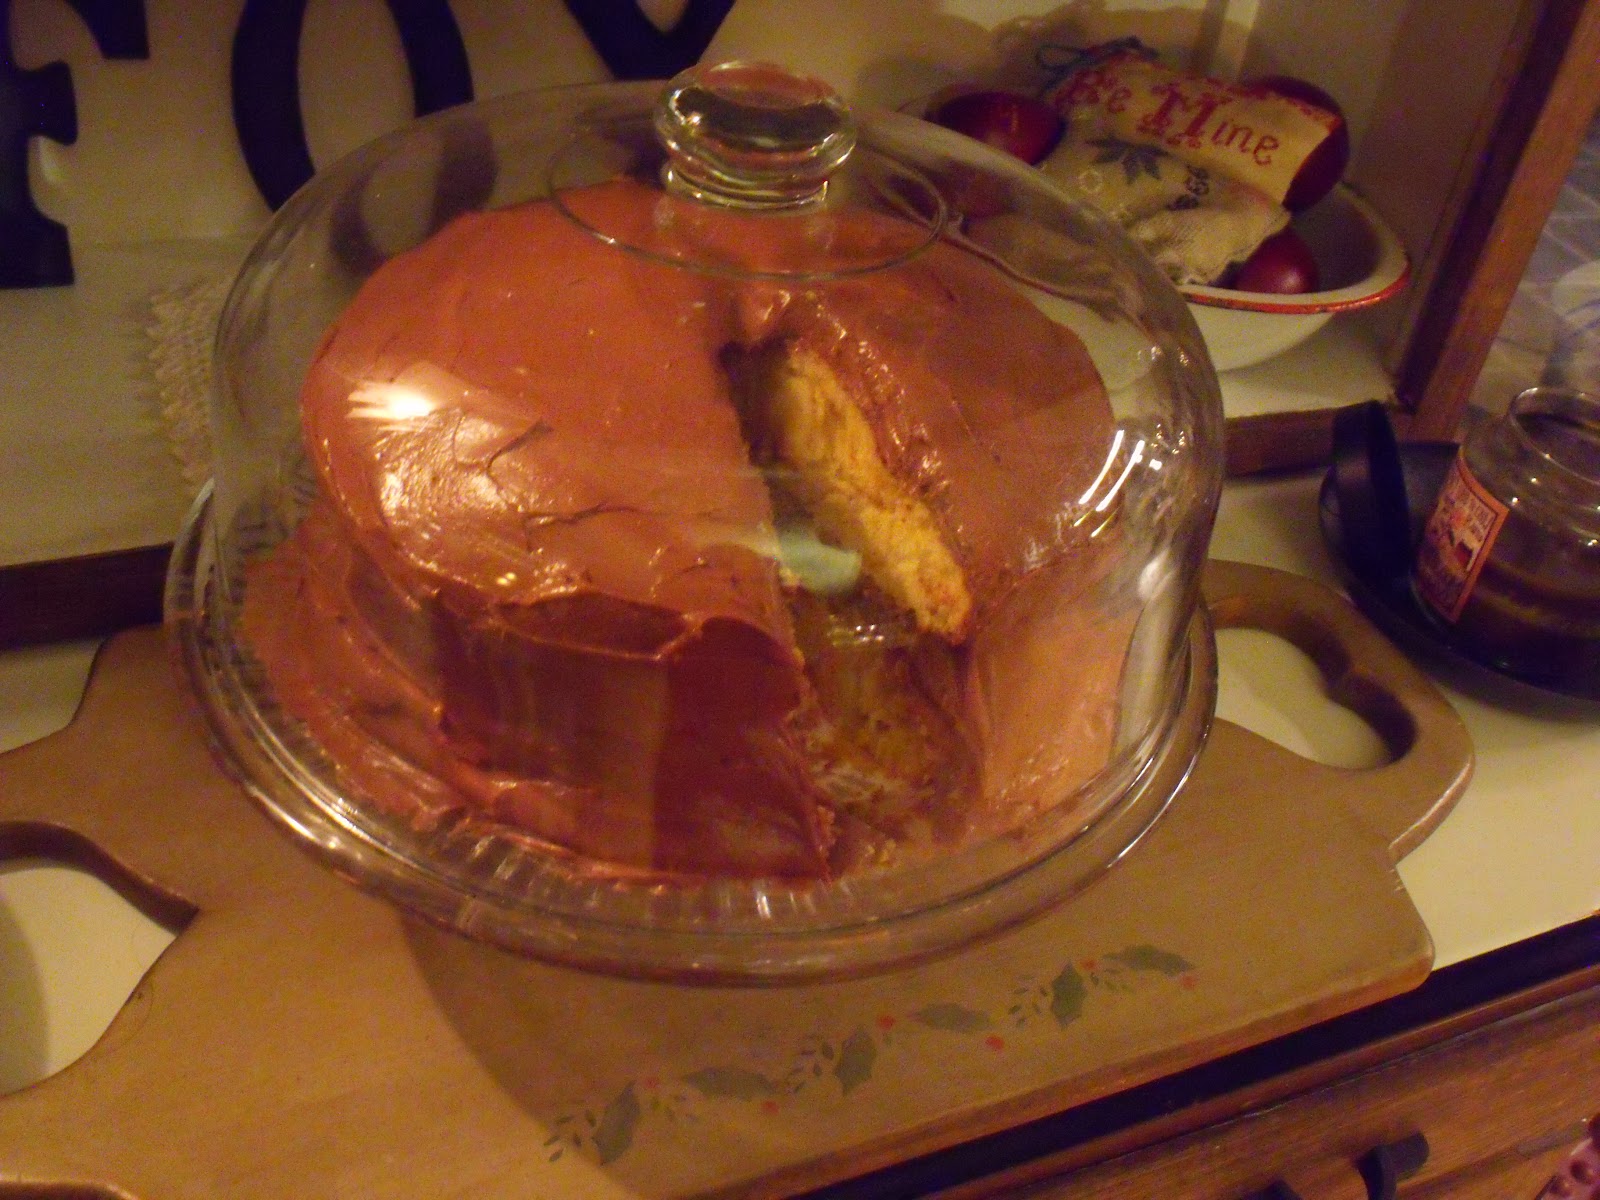
On the baking front, Mr. Darcy likes yellow cake with chocolate frosting so in between decorating,
I made up one. The frosting recipe is from a Better Homes and Garden cookbook.
It's a Chocolate Butter Frosting.
 
simple to make and oh so rich!
 
it made enough for extra cupcakes if you whip it up though....I was licking beaters and bowls until I was about sick.
The one piece was mine till he gets home. Yes, I'm a pig. :P
 
 
Our Hoosier cabinet makes a great place to put sweets for the week.

 
the recipe for the frosting is:
 
Chocolate Butter Frosting
 
takes about 30 minutes to make, 20 if you are quick
 
this yields 4 and 1/2 cups of frosting!!!!!!  They say enough for one layered cake. I say enough for 2.
 
3/4 cup of sweet butter softened
 
2 pounds of powdered sugar (in a 2lb large bag)
 
1/2 -3/4 cup of milk ( I used canned evaporated milk as I was out of regular)
 
2 tablespoons of vanilla
 
3/4 cup of unsweetened cocoa powder (I use Hershey's and a bit more to taste)
 
In an extra large mixing bowl beat butter (softened) with an electric mixer on medium speed until smooth and creamy. Gradually add 2 cups of the powdered sugar, beating well. Add the powdered cocoa. Beat in 2/3 cup or so of milk and vanilla. Gradually beat in remaining sugar ( LOTS). Beat in additional milk to reach spreading consistency.
To frost a 13 x 9 inch flat cake, halve the recipe.
 
Then try to refrain from licking all the icing and spread generously on the bottom layer and sides. Then plop out the 2nd from the baking pan and load up the top and ice and lick until your heart's desire. :0
 
 
So what else is on the stitching front???? Well, lots of cleaning and sorting into new cabinets downstairs in my sewing area. (didn't get it today) but in the process I pulled colors for the freebie previous to this post for Mr. Darcy and my first Christmas ornie.
 
I was about to pull the colors and then I found this in the mounds of stash.
 
 
so I decided to use these silks I got a couple of years ago and the ones I selected from the box for the sampler are here. Silks stitch like BUTTAH!
 
 
yep, with some small piece of 32 count antique white linen
 
 
Obviously this was in between the village decor and the chocolate mess I made. :P
 
My other things I gathered are a small wooden hoop I've had from the Scarlet Letter for 5 years or so and these scissors.


They are 7.99 including free shipping from Speed Factory Bike Ebay store. They are antiqued with titanium planting over stainless steel. They are razer sharp and 4 inches. They have several about 7 or 8 other vintage style scissors. Great for gifties for stitchers.
The seller for these on EBAY is:
 
hsuan05


Along with this small clip on Mighty Bright light and a pair of magnifying glasses and I'm good to go!


Well, best get back to decorating and cleaning up.
 
 Soon bedtime will be here and yes, I'm watching the 2 hour special of the Walton's wedding tonight if I can stay up late. Late to us is 10pm here on Fox Mountain. 

Soon to get out my Christmas cards.....
 
 
oh what a list of things to do in December! 


Till our threads entangle again,
 
Jennifer

Friday, July 9, 2010

Recipes I love from the Peach State


Parsley at Seasons of the Mind is having a World Recipe Exchange and I just sent her my favorites from Georgia, USA.
You can click on her blog   here
Email her two recipes from your neck of the woods!

Here are 2 recipes from the Georgia state (Peach state)
The first one is simple and easy and I use it with any fruit but especially Peach Cobbler. Bluberries are good too.

Quick Peach Cobbler from a Southern Peach (me)---Click HERE for pictures from mine


1 stick of butter, melted

1 cup of self-rising flour

1 cup of sugar

1 cup of milk

4 cups of sliced sweetened peaches (best if fresh but can use canned)
a good sprinkling of cinnamon and a dab of vanilla


Melt butter in the baking pan. I use a Corning dish and melt in the microwave.

Combine the flou, sugar, and the milk into another bowl. Pour the flour mixture (may be lumpy) directed over the melted butter in the center of the Corning dish.

DO NOT STIR. Take hunks of fruit, peaches and just placed them in the dish randomly. Do not stir.

Crust will rise up through the peaches.

Bake at 350 degrees for about 45 minutes or until brown.
This is my favorite way to make Peach Cobbler and my husband can eat it in bowls by the end of the day!

Serve with good vanilla ice cream on top or whipping cream.

Second recipe, another favorite of the Southern Girl (me)!
Super Southern Cornbread---click here for the full meal and pictures


2 cups of self-rising cornmeal (yellow)--not corn meal mix but the real stuff from the grainary

2 eggs

1/2 cup of vegetable oil

1 --15 oz can of sweet creamed corn

1 cup of sour cream.


Mix by stirring, no mixer. Let it sit for 15 minutes.

Pour in a well-greased (shortening coated not butter or it will burn) black cast iron pan, already hot in a 425 oven. I use my cast iron frying pan.

Bake for about 20 minutes. I like to serve this with a good, long all-day cooking of dried beans, chili, or with any Southern vegetable.

Extra cornbread can be saved for doggie treats the next day. They love it!

You can't go wrong with Southern Peach Cobbler and Cornbread added to your meal. (Well, I guess you could if you are having a lipid profile done the next morning at the doctor's office but........who's counting today, right?)

Enjoy!